Why need to do this?
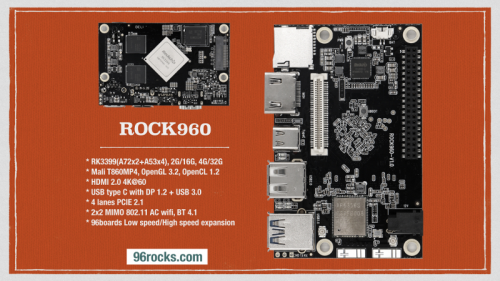
96Board developing team only provides armhf ( arm 32bit ) pre-build images in officially. But some people as like me, are need to use AARCH64 for better performance. This article is for people who demands runs Rock960 board on AARCH64.
Preparation
- x86.64bit debian based Linux, recommends ‘Linux Mint 18.x’.
- Make sure your linux ‘up to date’ by these
- `sudo apt-get update`
- `sudo apt-get upgrade`
- These packages to be installed before start.
- git related
- repo git-core gitk git-gui gcc-arm-linux-gnueabihf u-boot-tools device-tree-compiler gcc-aarch64-linux-gnu mtools parted pv libssl-dev
- some others
- binfmt-support qemu-user-static python-dbus python-debian python-parted python-yaml
- use `sudo apt-get install … ` with above packages to be installed.
- git related
- Some other tool binaries, ‘rkdeveloptool’ and ‘k3399_loader_v1.12.112.bin’.
- Recommend to install ‘rkdeveloptool’ to your system – ‘/usr/local/bin’.
- ‘rkdeveloptool’ is placed in ‘rkbin/tools’, or refer to my prebuilt image archive.
Clone Rock960 repositiory
There’s may many ways to getting source codes, but I recommend to do this way with your git client. And we before start, make a directory to identify where we are starting rock960 building work, so I recommend to make ‘rock960dev’ directory on your home ( ~, or ${HOME} ).
$ mkdir rock960dev
$ cd rock960dev
Then, let’s do these, remember – this work takes may long long waiting …
$ repo init -u https://github.com/96rocks/manifests -m rock960.xml
$ repo sync
$ repo start rock960-dev --all
Plus, if you like to use released version, switch each repositories to “96rocks/release-4.4-rock960” as like this:
$ repo start 96rocks/release-4.4-rock960 --all
Build kernel and u-boot
You may waited for long time to be done, now we need keep moving to next step to build kernel and u-boot. these are important your board works to ARM64(AARCH64).
And remember, Rock960 board model name is ‘rock960ab’, or if you bought ‘C’ model ( no built-in eMMC model ) means ‘rock960c’ – it’s little bit different model but same platform of RK3399.
Our journey will be started in ~/rock960dev, and type like these.
$ build/mk-kernel.sh rock960ab
$ build/mk-uboot.sh rock960ab
This works generates each ‘.config’ files in kernel and u-boot directory with default ‘rock960ab’ model configurations. You can change kernel options with ‘menuconfig’ in kernel directory with `make ARCH=arm64 menuconfig`.
Build file system
All linux ( or Windows, or Android too ) need file system that contains many things like busybox and desktop ( X11 ) for doing something. So we need build file system.
First thing to do, is install some packages in local ( don’t need to consider failure while install these, just skip them if met failure screen ) in ‘rootfs’ directory.
Le’ts move to ‘rootfs’ and your current directory path will be ‘ ~/rockdev/rootfs’, then let’s do this for once.
$ sudo dpkg -i ubuntu-build-service/packages/*
$ sudo apt-get install -f
Now, time to build desktop system !
$ RELEASE=stretch TARGET=desktop ARCH=arm64 ./mk-base-debian.sh
$ RELEASE=stretch ARCH=arm64 ./mk-rootfs.sh
$ ./mk-image.sh
Just a wait, you didn’t minded to build desktop (LXDE) build ? Just change TARGET to what you wnated – maybe server with ubuntu release ?
And it may takes really long waitness, drink a beer and fish&chips. Or a cup of coffee. Or continue to tomorrow.
Make a system.img
Everytime you done each work, all generated file copies to ‘rock960dev/out’ directory except root file system ( it generates linaro-rootfs.img in rootfs directory ). So when we reached to step for making file system done, now it need to make it a whole image as know as ‘system.img’.
Now let’s move to rock960dev directory, then proceed this.
$ build/mk-image.sh -c rk3399 -t system -r rootfs/linaro-rootfs.img
A file ‘system.img’ will be generated in ‘out’ directory.
Flashing your image to Rock960 board !
Now it is left only for last step of flashing new image to eMMC.
Let’s make your datas backed up to somewhere in Rock960 board, then step inside to flash eMMC and new 64bit linux with ‘MASKROM’ and ‘RESET’ buttons on board. Press them together and release only ‘RESET’ to enter ROM writing mode.
Now flashing them all
$ sudo rkdeveloptool db {Somewhere}/rk3399_loader_v1.12.112.bin
$ sudo rkdeveloptool wl 0 out/system.img
$ sudo rkdeveloptool rd